

Ranger Fuel Filler Neck Hose - The Good & The Bad!
Posted by JAMES HANSON on Sep 4th 2017
Most of the aftermarket fuel filler necks and hoses for the 1993-1997 ford ranger are complete junk. Because Replacing this is an expensive and tought job to do; You will not want to do it twice. Know the facts before you purchase one. There is Also An Installation Instructional Video At The Bottom Of This Blog.
Here is what to look out for
1) Junk Outer Hose For The 1993 1994 1995 1996 1997 Ford Ranger.
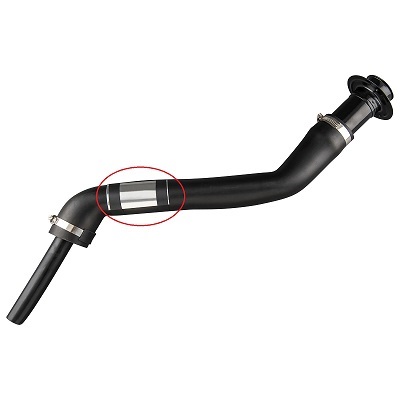
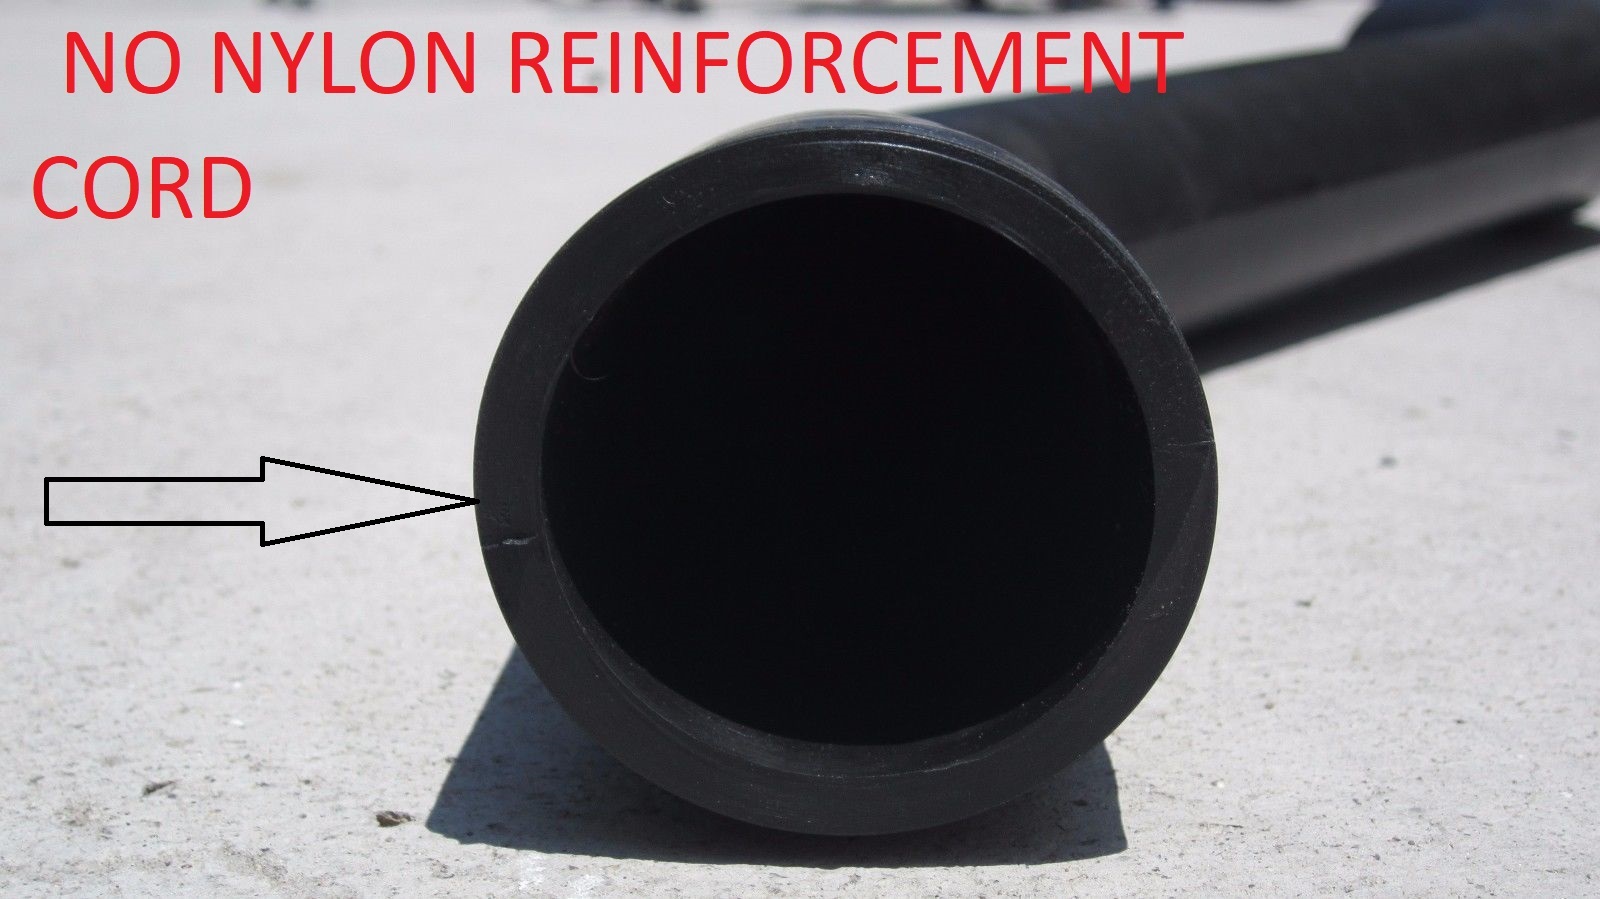
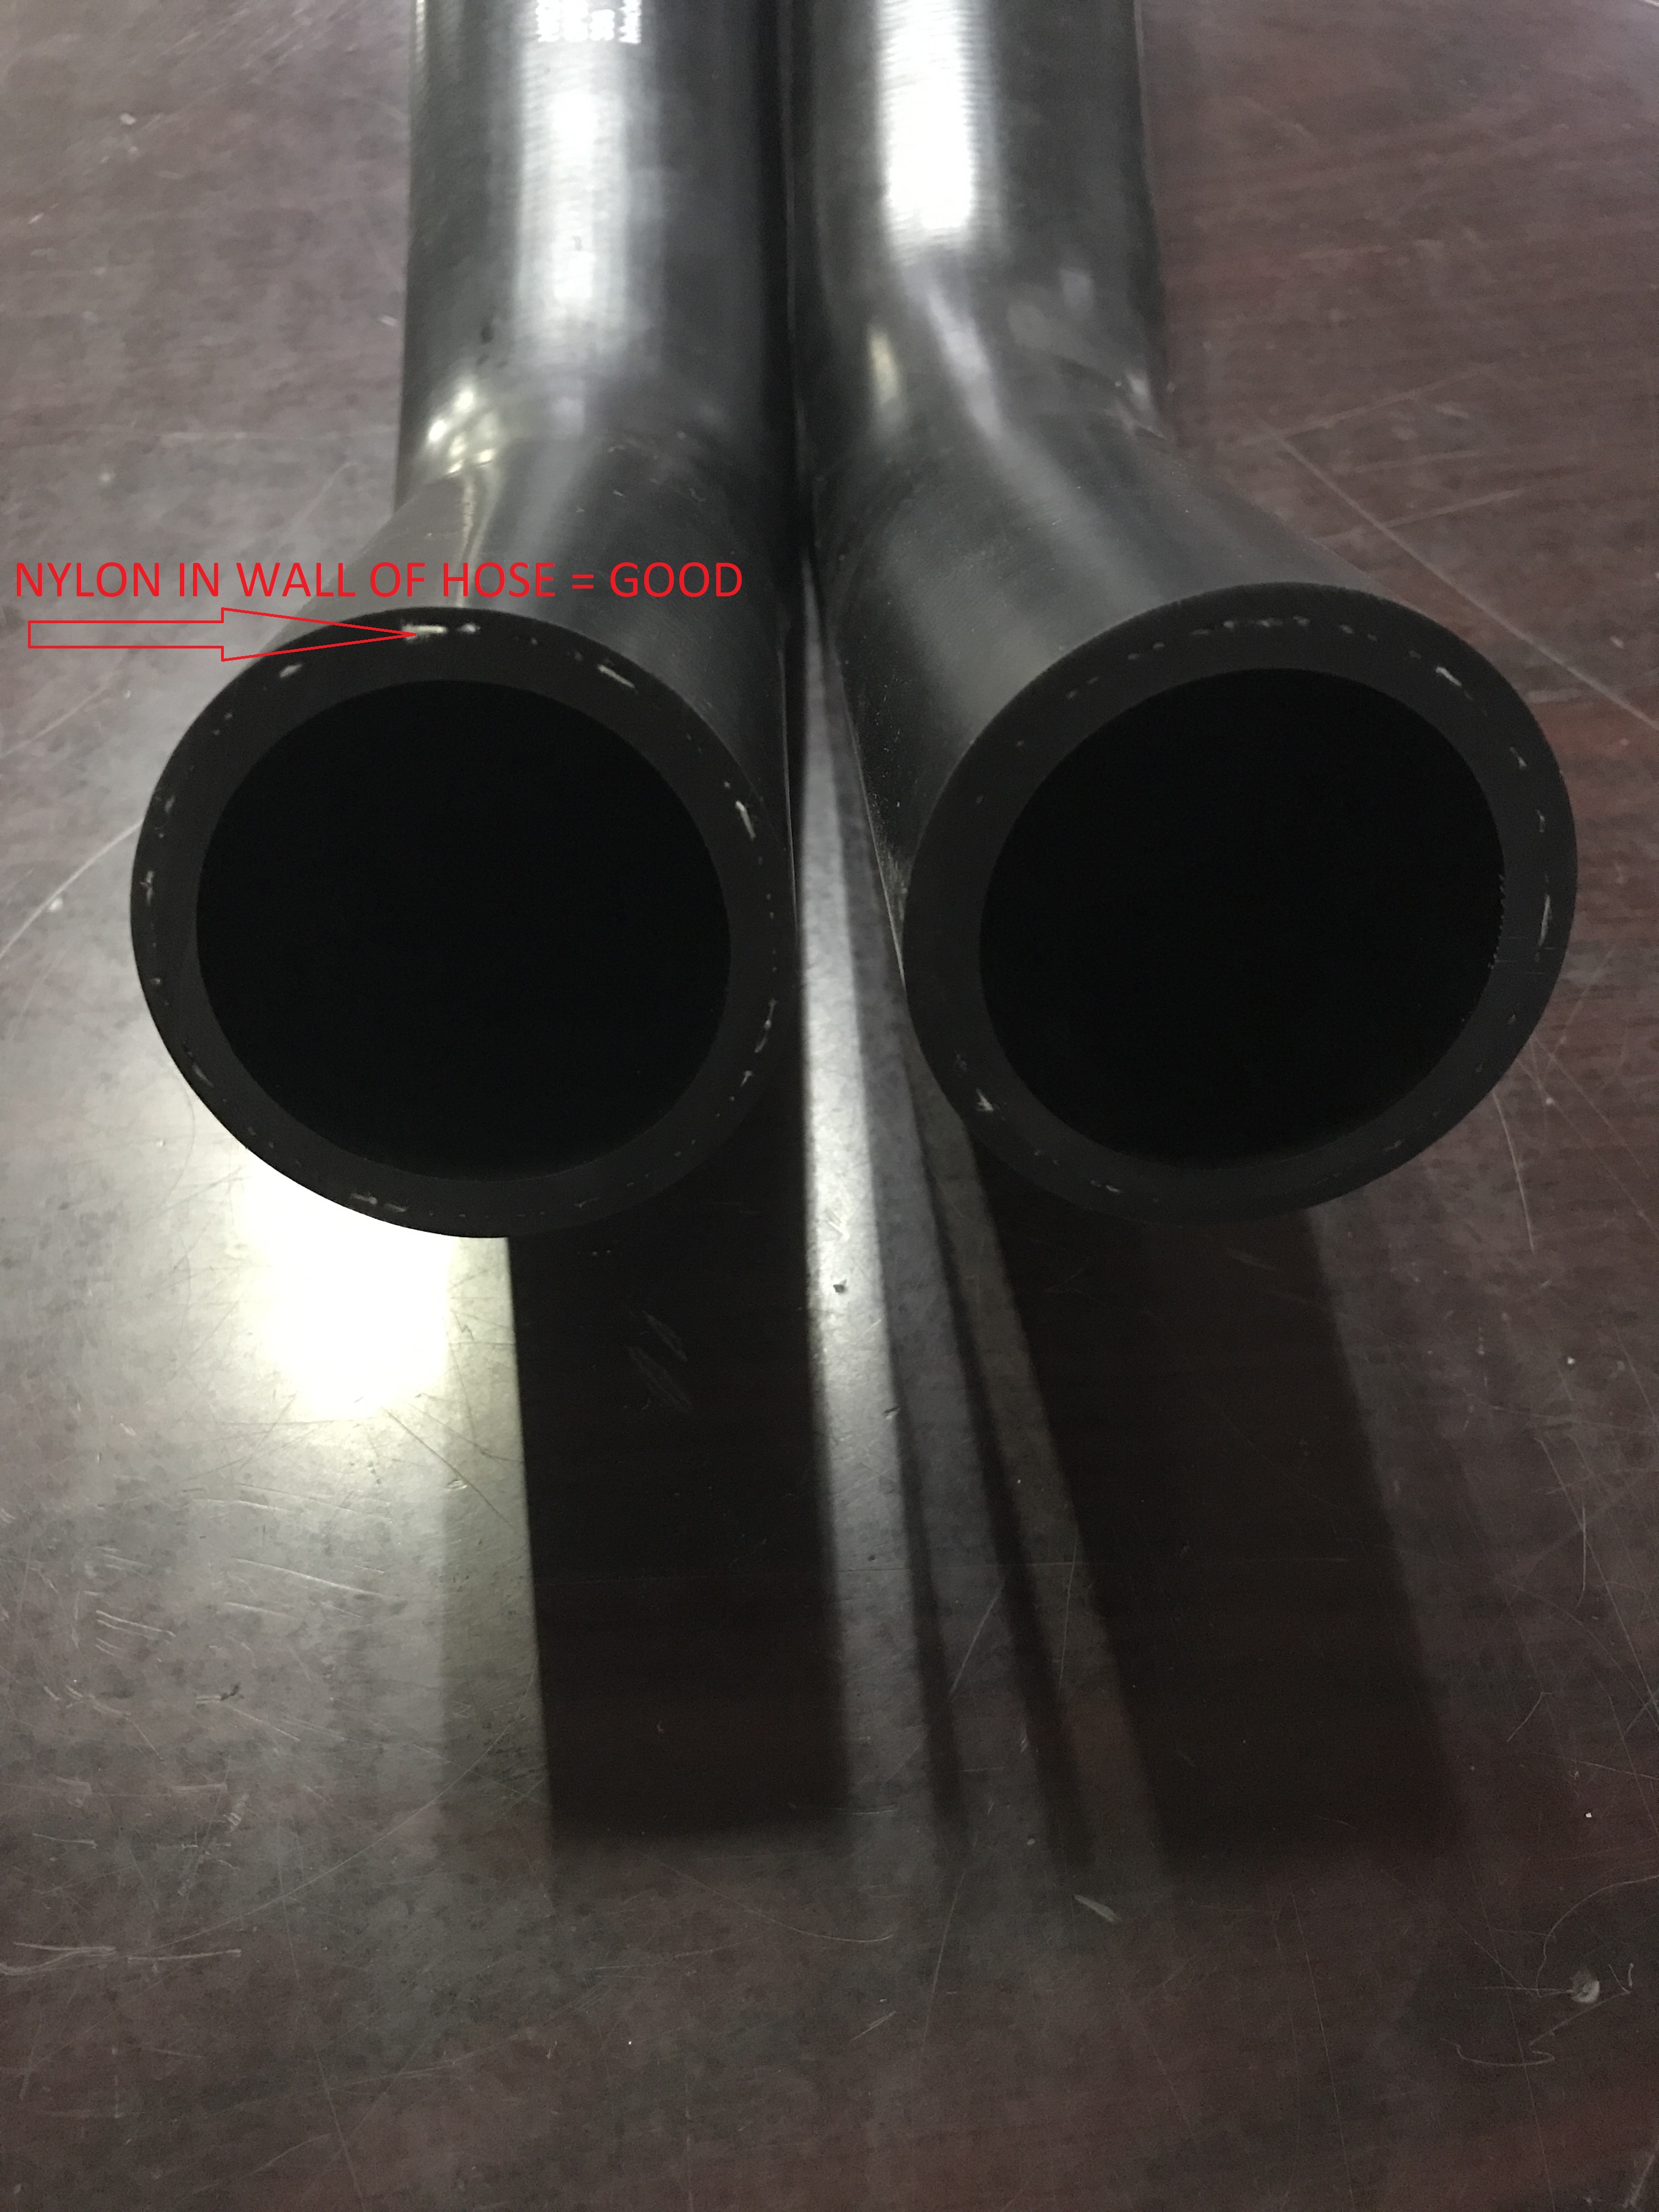
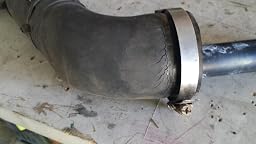
A) No Nylon Cord Reinforcement within the wall of the hose. A tall tale sign you are about to purchase one of these junk fuel filler hoses is metal guard type piece held on with electrical tape(See Red Circle In Photo 1. Also notice no white nylon fibers sticking out of the wall of the hose (See photo 2). STAY AWAY!!
These hoses are made completely of Nitrile Buna Rubber (NBR). While NBR is great for gasoline and diesel; It does not hold up to weather, and ozone. This causes the hose to crack within a year or two and will need to be replaced again.
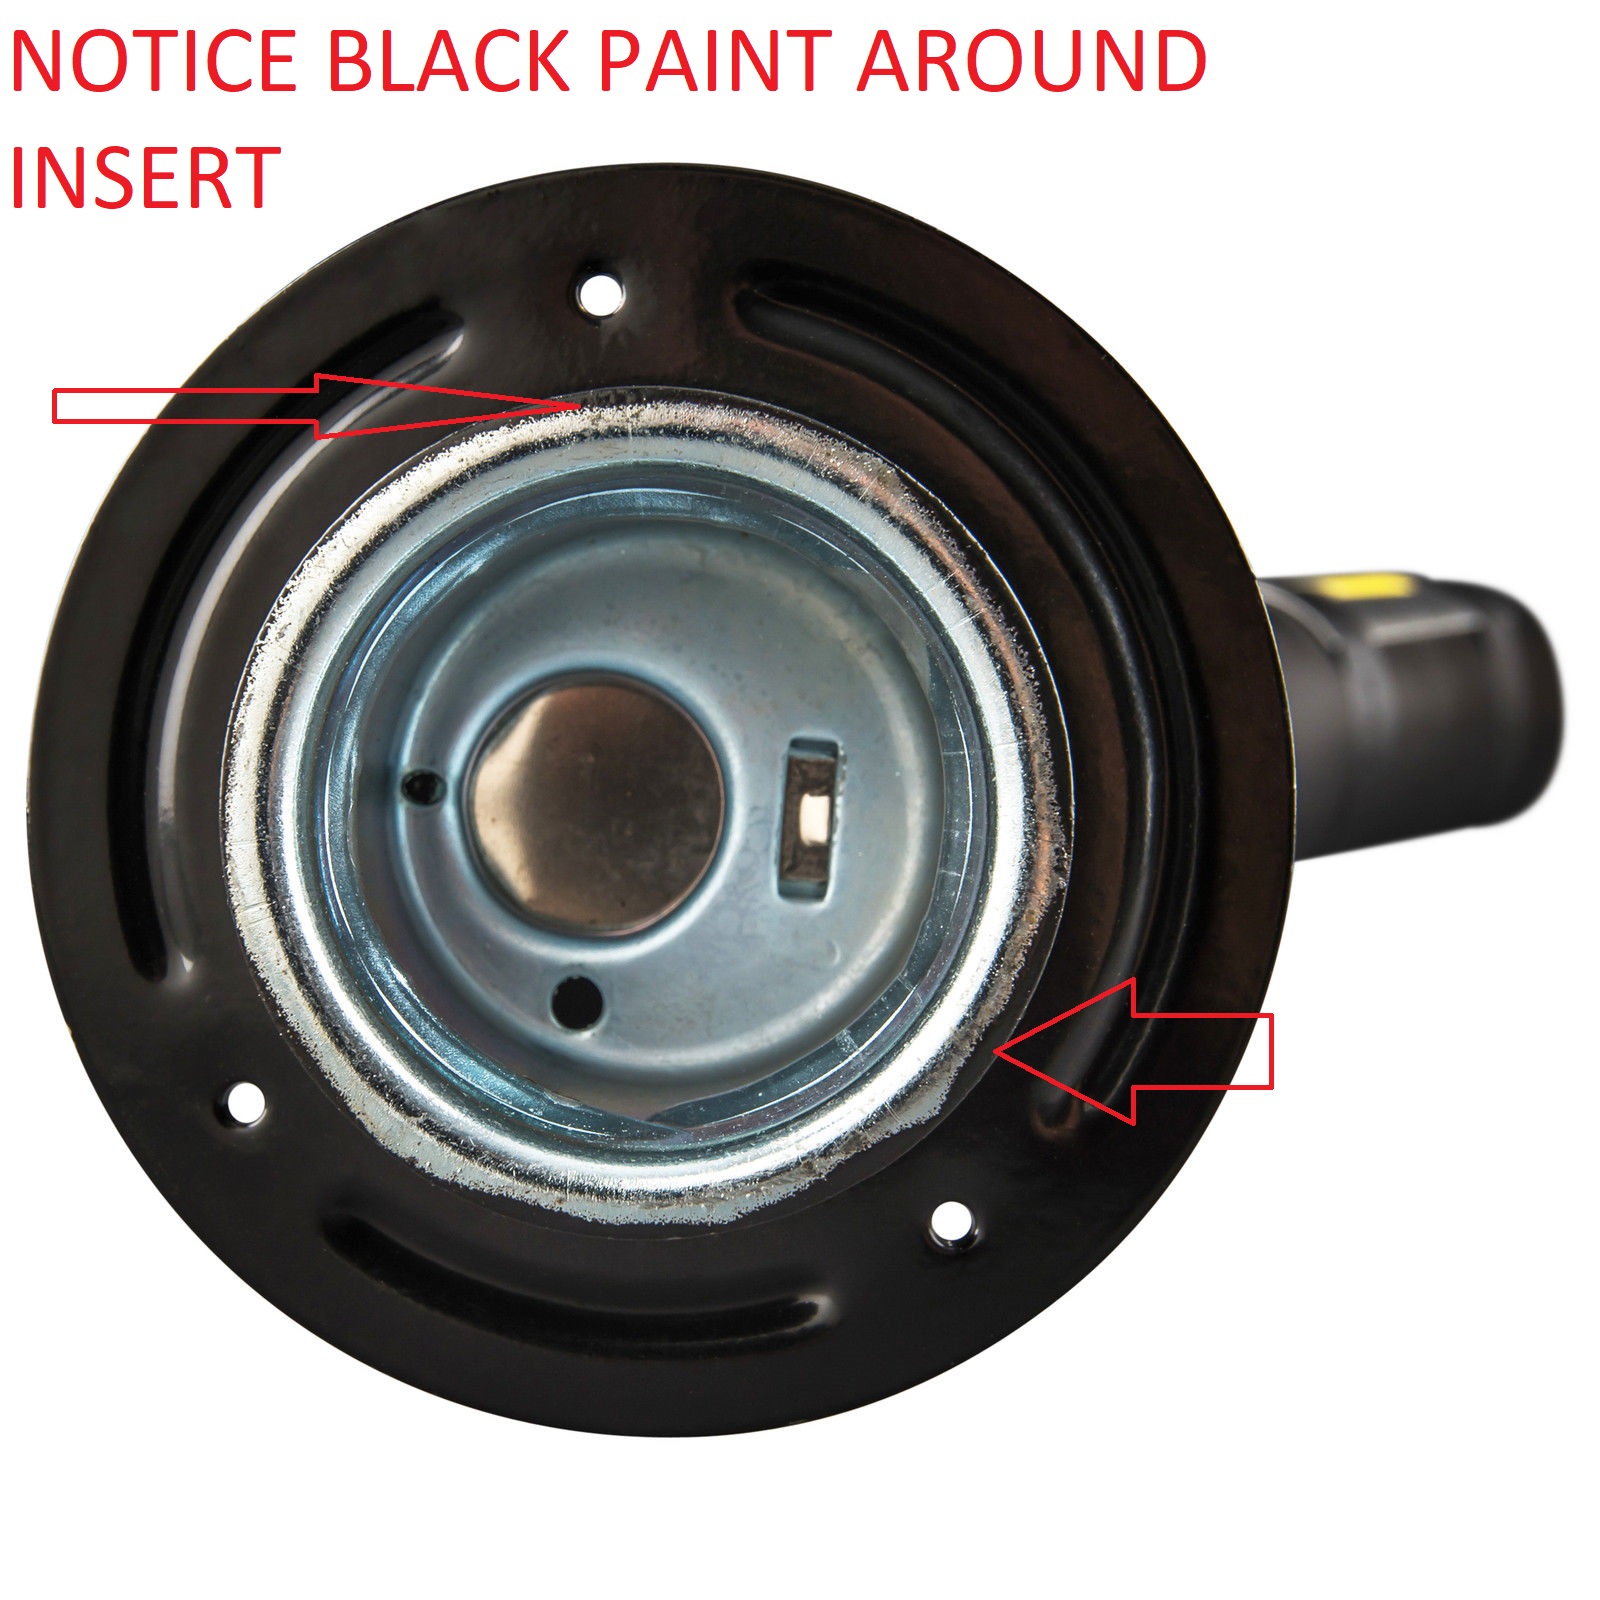
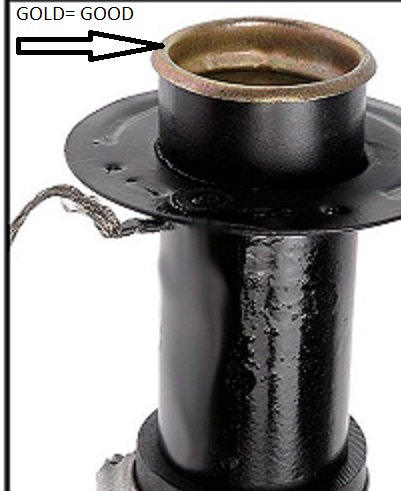
2) The Metal Fuel Filler Neck Problems For the 1993 1994 1995 1996 1997 Ford Ranger
The upper threaded cap insert is held in with a bondo type substance that will crack and cause the cap insert to leak causing your truck to not pass emissions or the flat out fall out completely, most of the time during shipping.
here is what to look for.
A) Notice the color of the cap insert. RULE OF THUMB (Shiny Silver Insert = Bad) & (Gold or Black Insert = Good)
B) Also notice the black paint on the outside surface of the insert.
Its truly unbelievable that these are getting released to the public. These things will fail 100% of the time.
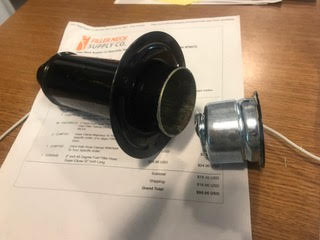
Here is an example of what type of insert you want, Although this one comes with an even worse hose. (NOTICE THE GOLD COLOR)
Testimonials And Feedback From Other Websites
ByJJon May 3, 2014
Verified Purchase
I bought this Fuel filler Neck about 15 months ago as of today May 3, 2014, it deteriorated. The rubber hose from the fuel tank to the filler neck has cracks everywhere. I would buy another brand. Sorry, but it wasted my time and labor. Do it correct the first time spend the money. I had to labor again to install another fuel filler neck. On a Mazda B2300 or Ford Ranger truck, you have to remove the truck bed. It is a hassle if you do not have the correct tools and help.
1.0 out of 5 starsPoor Quality
ByAmazon Customeron October 22, 2011
My old filler (outer) hose was cracked and thus failed California's emissions. Ordered this hose and had the following issues-
1)The inner hose collapsed at the first elbow. It took 10 minutes to put 4 gallons of gas in.
2)The epoxy that they used between the screw cup (what the gas cap screws into) and the fill neck failed and would not hold pressure thus failing the emissions tank pressure test.
3)The screw cup threads would not hold the gas cap properly (loose and would pop at the end of tightening).
MY resolution was to use the new outer hose on the old inner hose and neck. Truck passed pressure test.
ByLinda LaMaron July 27, 2015
Picture of the one I purchased only one year earlier, cracked all the way through, would not pass Ca. emissions, bought this one from a different seller, turns out to be the exact same one, just my luck.
Bycarlbakeron July 1, 2017
Garbage, broke after one month
2.0 out of 5 starsHose will crack after a few years... ethanol?
ByN5MJon July 15, 2017
Bought this item a few years ago. In that time, the outer hose had cracked and was leaking on both ends. OEM hose lasted nearly 15 years. Oddly, these filler neck hoses started cracking about the same time as ethanol was added to gas. Replaced with a different vendor, but same product received as previous order. Expecting the same non-longevity.
3.0 out of 5 starsI have gone through many of these on my Ford ...
ByJaeiousonon January 28, 2016
I have gone through many of these on my Ford Ranger. This particular filler tube is slightly above average quality. The tube rubber is prone to cracking around the base. It lasted longer than most other tubes I have used. Decent value for the price.
3.0 out of 5 starsTime Will Tell!
ByJohnon May 2, 2014
I hate to review items like this, but I replaced my fuel filler neck 2 years ago (1995 Ford Ranger extended cab XLT straight side yes this fits) and the outer hose basically disintegrated. The overflow wasn't fuel rated hose material however the inner fill hose still looks new. I would blame the failure on my keeping the tank topped off and fuel in the overflow hose itself for days at a time and consider it decent for the price if you didn't overflow your tank, however the end away from the tank was also rotting and cracked through. The thing came apart in 3 pieces after only a few years. I ordered this one because it did not look like the same manufacturer however when it arrived it doesn't have yellow banding and had the same blue QC dot as my old one. I knew this might be the result and do not feel bad about trying this one. I can remove the bed in under 20 minutes and get to everything easily. If this one fails like the last one did (which I suspect will be the case) then I'm going to go pull one out of a yard or suck it up and pay the over $100 price for the ones that specify fuel rated hose material and be done with it.
INSTALLATION INSTRUCTIONS:
-
STEP 1: REMOVE THE FUEL TANK FILLER NECK (1:31)
- Pop the gas hatch and remove the gas cap.
- Remove the three 7 mm bolts.
- Raise and secure the vehicle.
- Pull the fuel filler neck down.
- Hit the bolt with some penetrating oil.
- Use your 5/16� socket to loosen the clamp and disconnect the fuel filler neck.
- Use a flat blade screwdriver to break the seal to remove the hose if necessary.
-
STEP 2: INSTALL THE NEW FILLER NECK (4:05)
- Apply penetrating oil to the inner tube on the new filler neck to slide it into the hose easier.
- Tighten up the clamps.
- Bolt the filler neck in with your 7 mm socket and ratchet and the three bolts.
- Replace your gas cap and close the little door latch.
- Rust Penetrant Pliers, Cutters & misc Wrenches
- Needle nose pliers Ratchets & Related
- Ratchet
- Socket Extensions Screwdrivers & Related
- Flat Blade Screwdriver Sockets - Metric
- 7mm Socket Sockets - SAE
- 5/16 Inch Socket
Tools needed for replacement:
Materials, Fluids, and Supplies